
A new motorcycle helmet that compresses the temples or forehead within minutes presents a real dilemma. Taking it off provides relief, but riding without proper protection is not an option. Before concluding that the helmet is too small, several checks can help distinguish normal tightness from a real sizing or adjustment issue.
False tightness of the motorcycle helmet: causes you might not suspect
Have you ever felt uncomfortable pressure on your temples after half an hour of riding, even though the helmet seemed fine in the store? The problem doesn’t always stem from size.
You may also like : How to Spot a Real Tommy Hilfiger Bag: Tips and Practical Advice
Thick or rigid eyeglass arms create localized pressure on the temples and behind the ears. This painful point is often interpreted as a helmet being too tight, while simply switching to thin and flexible arms can eliminate the discomfort.
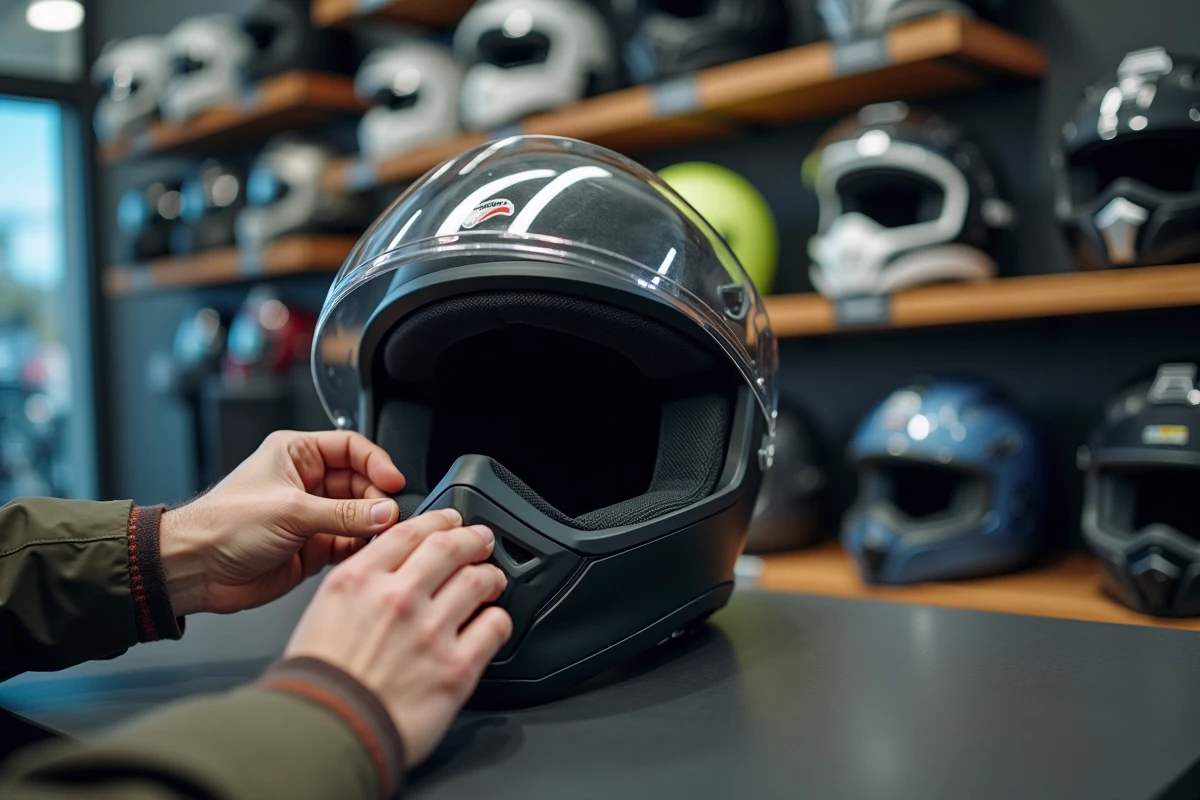
The addition of accessories also plays an underestimated role. An intercom kit glued inside the shell, flat earphones pressed against the padding, or an action camera mounted on top changes the pressure distribution. Even with a correctly sized helmet, a poorly placed accessory creates a pressure point. Before adjusting the padding, remove all accessories and try it on again without them.
You may also like : How to Donate Furniture to Emmaüs: Steps and Practical Tips for Success
To go further, you will find other tips to increase the comfort of a helmet that is too small that complement this initial check.
A helmet that is too tight but is actually just cluttered with accessories does not require any modifications. The diagnosis is as important as the solution.

Inner padding of the helmet: understanding their break-in before intervening
The cheek pads and the inner shell of a new helmet are compact. Their density is designed to compress with regular wear.
Break-in time for motorcycle helmet padding
On most models, the padding loses some of its thickness during the first weeks of use. A helmet that feels moderately tight at first will eventually conform to the shape of the skull. A light and even tightness on a new helmet is normal.
However, if the pressure is concentrated on a specific point (forehead, temples, top of the skull), the break-in alone will not solve the problem. The shape of the shell likely does not match your morphology.
When to replace the padding rather than forcing it
Many riders choose to wear their helmet at home for a few hours each day to speed up the compression. This method works for a light overall tightness. It does not work for localized pain.
If after two to three weeks of regular wear the discomfort persists in the same spot, replacing the cheek pads with a thinner thickness is the first intervention to consider. Most manufacturers offer padding kits in various thicknesses for the same model. Switching from standard thickness to a thinner one at the cheeks can transform comfort without compromising helmet retention.
Adjusting a tight motorcycle helmet: technical gestures that work
Once the diagnosis is made (it is indeed the helmet, not the accessories or the break-in), several interventions are possible depending on the intensity of the problem.
- Change the cheek pads for a smaller size. This is the most common and effective adjustment. On a full-face helmet, the cheek pads can be removed in seconds thanks to a clip system. Order the exact reference from the manufacturer to ensure compatibility.
- Temporarily remove the upper comfort shell (if removable) to check if the pressure comes from the top of the skull or the sides. This test helps to precisely locate the conflict area.
- Have the helmet adjusted by a professional in a specialized store. Some retailers have tools to slightly modify the shape of the internal padding or even to thermoform the shell on high-end models.
A point of caution: never remove material from the outer shell or the polystyrene layer. These elements ensure shock absorption. Any modification should be limited to removable comfort padding.
Tight motorcycle helmet and headaches: a signal not to ignore
A helmet that causes headaches after every ride is not just a minor comfort issue. A slightly tight helmet worn regularly increases the risk of prolonged headaches for riders. Constant pressure on the nerves of the forehead and temples causes tension headaches that the break-in of the padding does not always correct.
If the pain consistently appears after about thirty minutes of riding, it is a reliable indicator. Recurring headaches while wearing a helmet signal a sizing or shape problem, not tolerance.
The right approach is to compare your measured head circumference with the manufacturer’s sizing chart. Each brand uses its own measurements. An identical head circumference may correspond to an M in one brand and an L in another.
Skull shape and helmet compatibility
Beyond size, the shape of the skull plays a crucial role. Helmets are designed for three main profiles: round, intermediate oval, and long oval. A helmet designed for a round skull worn on a long oval skull will compress the temples, regardless of the chosen size.
In-store, the most reliable method remains to try on the helmet, wear it for at least ten minutes on-site, and then check that no marked pressure points appear on the forehead or temples. A good helmet fits evenly without pressure points.
Changing the size of the padding corrects overall tightness. Changing the model or brand corrects a shape incompatibility. Identifying which of the two applies saves time and money on adjustments that do not resolve anything.